Odoo MCP Server (Hybrid)
A hybrid Model Context Protocol (MCP) server that enables AI assistants to interact with Odoo ERP systems. Supports both HTTP streaming (for web AI agents) and stdio (for local AI assistants) modes.
📺 Demo
stdio Mode Demo (Claude Desktop)

HTTP Mode Demo (AI Agents & Remote Access)
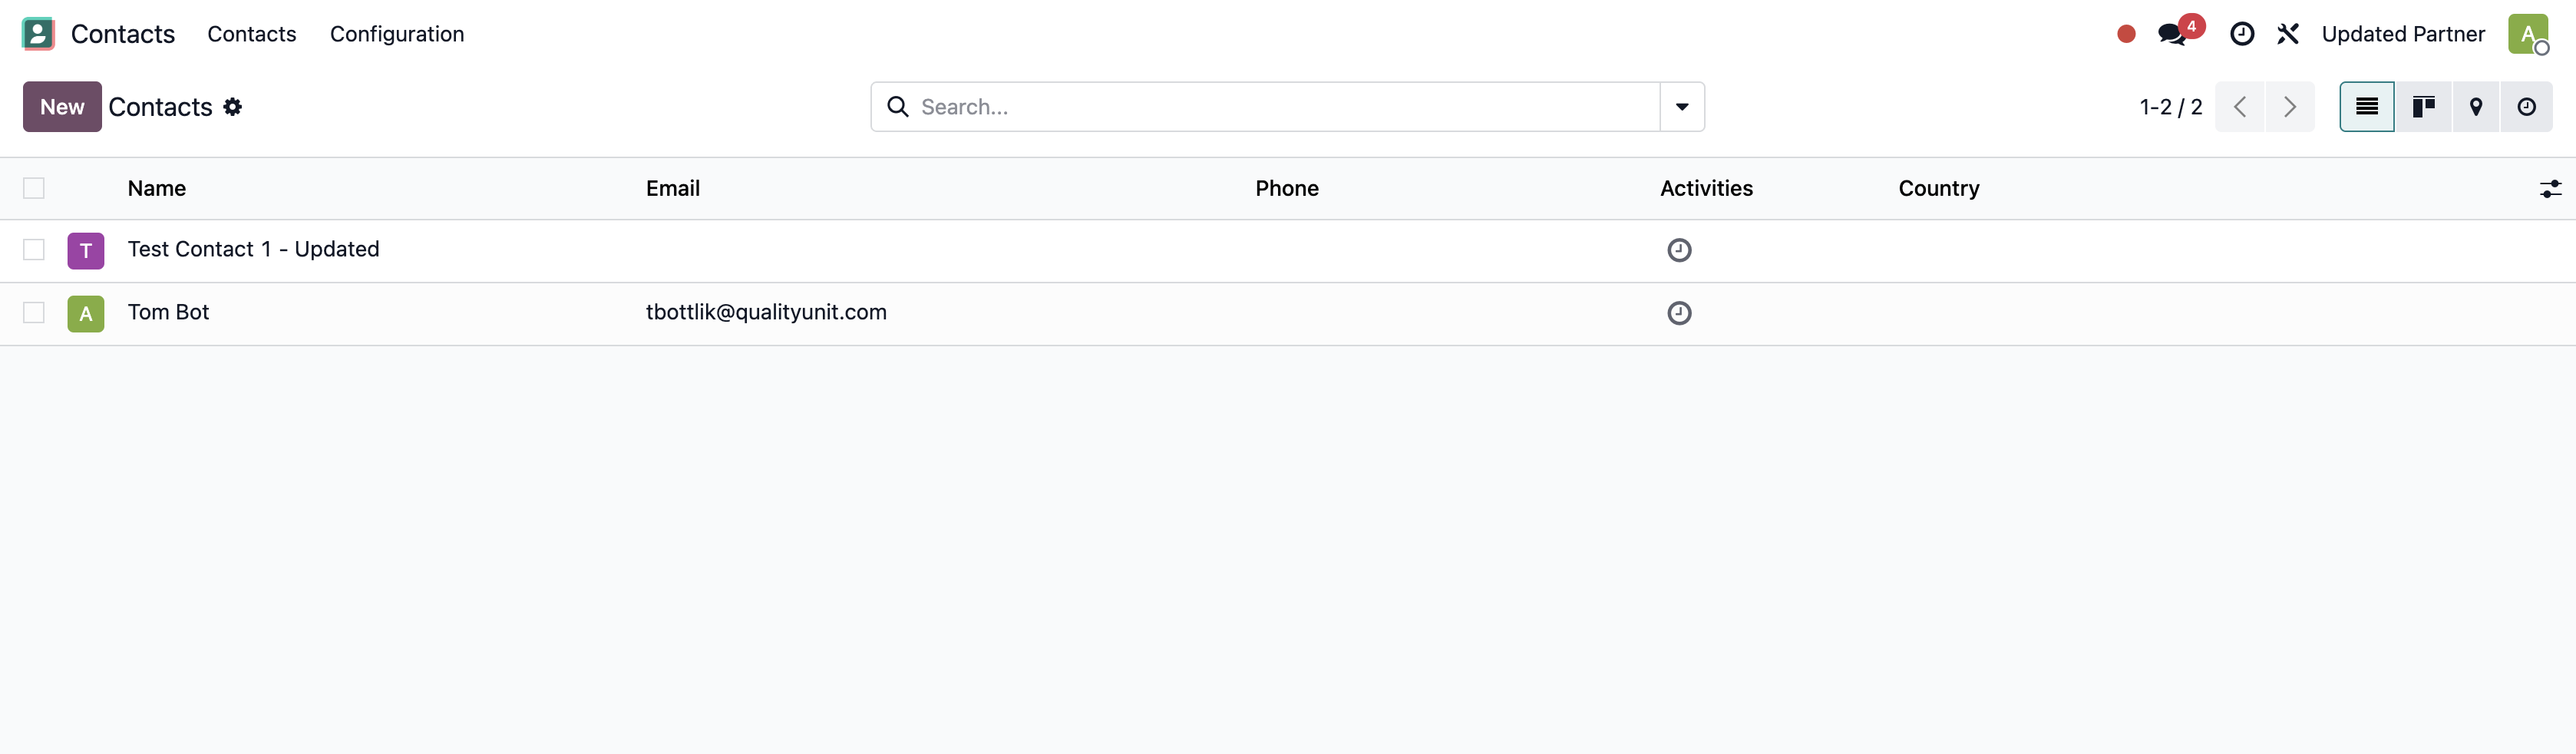
Example Output
🚀 Quick Start
HTTP Mode (AI Agents & Remote Access)
# Clone the repository
git clone https://github.com/vzeman/odoo-mcp-server.git
cd odoo-mcp-server
# Copy example and configure
cp docker-compose.example.yml docker-compose.yml
# Edit docker-compose.yml with your Odoo credentials
# Start with Docker Compose
docker-compose up -d
# Access the server
curl http://localhost:8000/health
stdio Mode (Claude Desktop)
Option 1: Install from PyPI (recommended)
# Install
pip install odoo-mcp-server
Option 2: Install from source
# Clone the repository
git clone https://github.com/vzeman/odoo-mcp-server.git
cd odoo-mcp-server
# Install in development mode
pip install -e .
Add to your Claude Desktop config file:
macOS: ~/Library/Application Support/Claude/claude_desktop_config.json
Windows: %APPDATA%/Claude/claude_desktop_config.json
{
"mcpServers": {
"odoo": {
"command": "python",
"args": ["-m", "mcp_server_odoo"],
"env": {
"ODOO_URL": "https://your-instance.odoo.com",
"ODOO_DB": "your-database",
"ODOO_USERNAME": "your-email@example.com",
"ODOO_API_KEY": "your-api-key"
}
}
}
}
Local Development
# Clone the repository
git clone https://github.com/vzeman/odoo-mcp-server.git
cd odoo-mcp-server
# Install dependencies
pip install -e .
# Set environment variables
export ODOO_URL="https://your-instance.odoo.com"
export ODOO_DB="your-database"
export ODOO_USERNAME="your-email@example.com"
export ODOO_API_KEY="your-api-key"
# Run the HTTP server
python -m mcp_server_odoo.http_server
# Run the stdio server
python -m mcp_server_odoo
🌐 Remote Access with ngrok (AI Agent Integration)
This implementation allows you to expose your local MCP server to AI agents like Flowhunt, enabling remote automation of your Odoo business processes.
Why Use ngrok?
- Remote AI Access: AI agents can connect to your MCP server from anywhere
- Business Automation: Enable Flowhunt and other AI platforms to automate your Odoo workflows
- Secure Tunneling: ngrok provides secure HTTPS tunnels with authentication
- No Infrastructure: No need to deploy to cloud servers
Setup Instructions
1. Install ngrok
Download and Install:
# macOS (using Homebrew)
brew install ngrok
# Or download directly from https://ngrok.com/download
Sign up and get your authtoken:
- Go to ngrok.com and create a free account
- Get your authtoken from the dashboard
- Configure ngrok:
ngrok config add-authtoken YOUR_AUTHTOKEN_HERE
2. Start Your MCP Server
# Start the MCP server with Docker
docker-compose up -d
# Verify it's running locally
curl http://localhost:8000/health
3. Create ngrok Tunnel
# Create a public tunnel to your local MCP server
ngrok http http://localhost:8080
# You'll see output like:
# Session Status online
# Account your-email@example.com
# Version 3.x.x
# Region United States (us)
# Latency -
# Web Interface http://127.0.0.1:4040
# Forwarding https://abc123.ngrok-free.app -> http://localhost:8000
Copy the HTTPS URL (e.g., https://abc123.ngrok-free.app) - this is your public MCP server endpoint.
Flowhunt Implementation Process:
Create a custom flow with AI Agents:
- Create a New Flow:
- Go to Flowhunt Dashboard
- Click "Create New Flow"
- Give your flow a name (e.g., "Odoo Business Automation")
- Add AI Agent Component:
- Drag and drop an "AI Agent" component into your flow
- Connect the AI Agent to:
- Input: Data source or trigger
- Output: Next step in your workflow
- Chat History: For context and conversation memory
- MCP Server: Your Odoo MCP server
- Configure MCP Server Connection:
- In the AI Agent settings, go to "MCP Server Configuration"
- Server URL:
https://abc123.ngrok-free.app - Protocol: HTTP/HTTPS
- Authentication: None (or configure as needed)
- Save the configuration
- Test the Connection:
- In your Flowhunt flow, start a chat with the AI Agent
- Ask the AI to test the Odoo connection, for example:
"Can you list all available Odoo models?"
"Show me the first 5 customers in the system"
"What tools are available for Odoo operations?"
- The AI should be able to access your Odoo data through the MCP server
5. Flowhunt Workflow Examples
Complete Flow Setup Process:
- Customer Follow-up Flow:
Trigger: Daily schedule or webhook
↓
AI Agent: "Find customers who haven't purchased in 6 months"
↓ (uses MCP: search_records)
AI Agent: "Create follow-up tasks for each customer"
↓ (uses MCP: create_record)
Output: Email report or Slack notification
- Sales Order Automation:
Trigger: New lead qualification webhook
↓
AI Agent: "Check if lead is qualified and ready for sales order"
↓ (uses MCP: search_records, get_record)
AI Agent: "Create sales order with appropriate products"
↓ (uses MCP: create_record)
Output: Sales order confirmation email
- Inventory Management Flow:
Trigger: Hourly schedule
↓
AI Agent: "Check all products for low stock levels"
↓ (uses MCP: search_records)
AI Agent: "Create purchase orders for items below reorder point"
↓ (uses MCP: create_record)
Output: Purchase order notifications to procurement team
AI Agent Prompts for Odoo Operations:
# Customer Management
"Search for all customers in California with more than $10,000 in total sales"
# Sales Operations
"Create a new sales order for customer ID 42 with 5 units of product ID 123"
# Inventory Tracking
"Find all products with stock quantity below 10 and create purchase orders"
# Financial Reporting
"Generate a report of all unpaid invoices from the last 30 days"
Advanced ngrok Configuration
Custom Subdomain (Paid Plan)
# Use a custom subdomain for consistent URLs
ngrok http 8000 --subdomain=my-odoo-mcp
# Results in: https://my-odoo-mcp.ngrok.io
Authentication & Security
# Add basic authentication
ngrok http 8000 --basic-auth="username:password"
# Add custom headers
ngrok http 8000 --request-header-add="X-Custom-Header: value"
Multiple Tunnels
# Create multiple tunnels for different services
ngrok http 8000 --subdomain=odoo-mcp
ngrok http 3000 --subdomain=odoo-web
Production Considerations
1. Persistent Tunnels
For production use, consider:
- ngrok Pro/Enterprise: For persistent URLs and custom domains
- Self-hosted ngrok: For complete control
- Alternative solutions: Cloudflare Tunnel, localtunnel, etc.
2. Security Best Practices
# Use authentication
ngrok http 8000 --basic-auth="admin:secure-password"
# Restrict to specific IPs (if using ngrok Pro)
ngrok http 8000 --allow-cidr="192.168.1.0/24"
# Use custom domains with SSL
ngrok http 8000 --hostname=your-domain.com
3. Monitoring & Logs
# View ngrok web interface
# Open http://127.0.0.1:4040 in your browser
# Monitor requests and responses
# Check MCP server logs
docker-compose logs -f mcp-server
Troubleshooting
Common Issues
1. ngrok Tunnel Not Working:
# Check if ngrok is authenticated
ngrok config check
# Verify local server is running
curl http://localhost:8000/health
# Check ngrok status
ngrok status
2. AI Agent Can't Connect:
- Try asking the AI Agent simple questions in the chat:
"What Odoo models are available?"
"Can you search for customers?"
- Check if the AI responds with Odoo data or error messages
- Verify the MCP Server URL is correct in the AI Agent settings
- Ensure the ngrok tunnel is still active (check ngrok dashboard)
3. Authentication Issues:
- If you configured basic authentication in ngrok, ensure the AI Agent settings include the credentials
- Test in the AI chat by asking: "Can you access the Odoo system?"
- Check the AI Agent's MCP Server configuration for authentication settings
- Verify the ngrok tunnel is configured with the same auth credentials
Integration Examples
Flowhunt Flow Configuration
In Flowhunt Dashboard:
- Flow Structure:
[Input/Trigger] → [AI Agent] → [Output/Action]
↓
[Chat History]
↓
[MCP Server] ← ngrok URL
- AI Agent MCP Settings:
- MCP Server URL:
https://abc123.ngrok-free.app - Connection Type: HTTP/HTTPS
- Authentication: None (or Basic Auth if configured)
- Available Tools: All 12 Odoo MCP tools will be automatically detected
- Flow Example Configuration:
Flow Name: "Odoo Customer Management"
Components:
- Input: Webhook/API trigger
- AI Agent:
- Model: GPT-4 or Claude
- MCP Server: https://abc123.ngrok-free.app
- Chat History: Enabled
- Output: Email notification or webhook response
Custom AI Agent Integration
import requests
class RemoteOdooMCPClient:
def __init__(self, ngrok_url, auth=None):
self.base_url = ngrok_url.rstrip('/')
self.auth = auth
def call_tool(self, tool_name, **kwargs):
response = requests.post(
f"{self.base_url}/",
json={
"jsonrpc": "2.0",
"id": 1,
"method": "tools/call",
"params": {
"name": tool_name,
"arguments": kwargs
}
},
auth=self.auth
)
return response.json()
# Usage
client = RemoteOdooMCPClient("https://abc123.ngrok-free.app")
customers = client.call_tool("search_records", model="res.partner", limit=10)
This setup enables powerful AI-driven automation of your Odoo business processes through secure remote access!
Custom MCP Server Development
We develop MCP Servers for customers, if you need MCP server for your own system similar to Odoo MCP server, please contact us (https://www.flowhunt.io/contact/).
Here is the description how we develop MCP Servers for our customers: https://www.flowhunt.io/services/mcp-server-development/
Demo
📺 Watch the demo on YouTube
Features
- 🔍 Search Records: Query any Odoo model with complex domain filters
- ➕ Create Records: Add new records to any Odoo model
- ✏️ Update Records: Modify existing records
- 🗑️ Delete Records: Remove records from the system
- 📊 Read Records: Fetch detailed information about specific records
- 📋 List Models: Discover available models in your Odoo instance
- 🔧 Model Introspection: Get field definitions for any model
- 🌐 HTTP Streaming: Full MCP Streamable HTTP transport support
- 🐳 Docker Ready: Complete containerization with Docker Compose
- 🔄 Server-Sent Events: Real-time streaming responses
- 🛡️ Security: Origin validation, CORS support, and session management
- 📊 Monitoring: Health checks, metrics, and observability
Installation
🐳 Docker (Recommended)
# Clone the repository
git clone https://github.com/vzeman/odoo-mcp-server.git
cd odoo-mcp-server
# Copy environment file and configure
cp .env.example .env
# Edit .env with your Odoo credentials
# Start with Docker Compose
docker-compose up -d
📦 Via pip
pip install odoo-mcp-server
🔧 From source
git clone https://github.com/vzeman/odoo-mcp-server.git
cd odoo-mcp-server
pip install -e .
Configuration
Environment Variables
Create a .env file in your project directory or set these environment variables:
ODOO_URL=https://your-instance.odoo.com
ODOO_DB=your-database-name
ODOO_USERNAME=your-username@example.com
ODOO_API_KEY=your-api-key-here
Getting Odoo Credentials
- API Key:
- Log into your Odoo instance
- Go to Settings → Users & Companies → Users
- Select your user
- Under "API Keys" or "Security" tab, create a new API key
- Copy the key immediately (it won't be shown again)
- Database Name:
- Usually visible in the URL when logged in
- Or check Settings → Activate Developer Mode → Database Info
- Username:
🚀 Quick Start
Docker Deployment
- Clone and configure:
git clone https://github.com/vzeman/odoo-mcp-server.git
cd odoo-mcp-server
- Configure your Odoo credentials:
# Copy the example file
cp docker-compose.example.yml docker-compose.yml
# Edit docker-compose.yml with your Odoo credentials
nano docker-compose.yml
Or edit the environment section directly:
environment:
- ODOO_URL=https://your-instance.odoo.com
- ODOO_DB=your-database-name
- ODOO_USERNAME=your-username@example.com
- ODOO_API_KEY=your-api-key-here
- Start the services:
# Basic deployment
docker-compose up -d
# With monitoring stack
docker-compose --profile monitoring up -d
# With nginx proxy
docker-compose --profile proxy up -d
- Access the server:
- MCP Endpoint:
http://localhost:8000/mcp or http://localhost:8000/ (POST) - Health Check:
http://localhost:8000/health - API Documentation:
http://localhost:8000/docs - Server Info:
http://localhost:8000/ (GET)
Local Development
# Install dependencies
pip install -e .
# Set environment variables
export ODOO_URL="https://your-instance.odoo.com"
export ODOO_DB="your-database"
export ODOO_USERNAME="your-email@example.com"
export ODOO_API_KEY="your-api-key"
# Run the HTTP server
python -m mcp_server_odoo
🔌 Client Integration
MCP Server Inspector
The server is fully compatible with the MCP Server Inspector. Use these connection settings:
- URL:
http://localhost:8000 - Method:
POST - Content-Type:
application/json - Endpoint:
/ (root endpoint)
The server automatically handles both GET (server info) and POST (MCP protocol) requests on the root endpoint.
HTTP Streaming Client
Connect to the MCP server using HTTP streaming transport:
import httpx
import json
# Initialize session
response = httpx.post(
"http://localhost:8000/mcp",
json={
"jsonrpc": "2.0",
"id": 1,
"method": "initialize",
"params": {
"protocolVersion": "2024-11-05",
"capabilities": {},
"clientInfo": {"name": "test-client", "version": "1.0.0"}
}
},
headers={"Accept": "application/json, text/event-stream"}
)
# Get session ID from response headers
session_id = response.headers.get("Mcp-Session-Id")
# Make tool calls
response = httpx.post(
"http://localhost:8000/mcp",
json={
"jsonrpc": "2.0",
"id": 2,
"method": "tools/call",
"params": {
"name": "search_records",
"arguments": {
"model": "res.partner",
"domain": [["is_company", "=", True]],
"limit": 10
}
}
},
headers={
"Mcp-Session-Id": session_id,
"Accept": "application/json, text/event-stream"
}
Server-Sent Events (SSE) Streaming
For real-time streaming responses:
import httpx
import json
# Stream responses using SSE
with httpx.stream(
"POST",
"http://localhost:8000/mcp",
json={
"jsonrpc": "2.0",
"id": 1,
"method": "tools/call",
"params": {
"name": "search_records",
"arguments": {
"model": "res.partner",
"domain": [["is_company", "=", True]],
"limit": 10
}
}
},
headers={"Accept": "text/event-stream"}
) as response:
for line in response.iter_lines():
if line.startswith("data: "):
data = json.loads(line[6:]) # Remove "data: " prefix
print(f"Received: {data}")
JSON Integration
The server provides a comprehensive JSON API for direct integration with any application. All MCP protocol methods are available via standard HTTP POST requests.
{
"jsonrpc": "2.0",
"id": 1,
"method": "method_name",
"params": {
"parameter1": "value1",
"parameter2": "value2"
}
}
Example: Initialize Connection
curl -X POST http://localhost:8000/ \
-H "Content-Type: application/json" \
-d '{
"jsonrpc": "2.0",
"id": 1,
"method": "initialize",
"params": {
"protocolVersion": "2024-11-05",
"capabilities": {},
"clientInfo": {"name": "my-app", "version": "1.0.0"}
}
}'
curl -X POST http://localhost:8000/ \
-H "Content-Type: application/json" \
-d '{
"jsonrpc": "2.0",
"id": 2,
"method": "tools/list",
"params": {}
}'
curl -X POST http://localhost:8000/ \
-H "Content-Type: application/json" \
-d '{
"jsonrpc": "2.0",
"id": 3,
"method": "tools/call",
"params": {
"name": "search_records",
"arguments": {
"model": "res.partner",
"limit": 5
}
}
}'
JavaScript/Node.js Integration
const axios = require('axios');
class OdooMCPClient {
constructor(baseUrl = 'http://localhost:8000') {
this.baseUrl = baseUrl;
this.requestId = 1;
}
async call(method, params = {}) {
const response = await axios.post(this.baseUrl, {
jsonrpc: "2.0",
id: this.requestId++,
method: method,
params: params
}, {
headers: { 'Content-Type': 'application/json' }
});
return response.data.result;
}
async searchRecords(model, options = {}) {
return this.call('tools/call', {
name: 'search_records',
arguments: { model, ...options }
});
}
async createRecord(model, values) {
return this.call('tools/call', {
name: 'create_record',
arguments: { model, values }
});
}
}
// Usage
const client = new OdooMCPClient();
const partners = await client.searchRecords('res.partner', { limit: 10 });
console.log(partners);
Python Integration
import requests
import json
class OdooMCPClient:
def __init__(self, base_url="http://localhost:8000"):
self.base_url = base_url
self.request_id = 1
def call(self, method, params=None):
payload = {
"jsonrpc": "2.0",
"id": self.request_id,
"method": method,
"params": params or {}
}
self.request_id += 1
response = requests.post(
self.base_url,
json=payload,
headers={"Content-Type": "application/json"}
)
return response.json()["result"]
def search_records(self, model, **options):
return self.call("tools/call", {
"name": "search_records",
"arguments": {"model": model, **options}
})
def create_record(self, model, values):
return self.call("tools/call", {
"name": "create_record",
"arguments": {"model": model, "values": values}
})
# Usage
client = OdooMCPClient()
partners = client.search_records("res.partner", limit=10)
print(partners)
MCP Client Integration
For Claude Desktop, Cursor, or other MCP clients, use this configuration:
Claude Desktop (claude_desktop_config.json):
{
"mcpServers": {
"odoo-mcp-server": {
"command": "npx",
"args": [
"-y",
"mcp-remote",
"http://localhost:8000"
]
}
}
}
Cursor (.cursor/mcp.json):
{
"mcpServers": {
"odoo-mcp-server": {
"command": "npx",
"args": [
"-y",
"mcp-remote",
"http://localhost:8000"
]
}
}
}
Setup Steps:
- Start your MCP server:
docker-compose up -d - Install mcp-remote:
npm install -g mcp-remote - Add the configuration above to your MCP client
- Restart your MCP client
- You'll have access to all 12 Odoo tools!
✅ Current Status:
- HTTP JSON-RPC endpoints work correctly via
curl - All 12 Odoo tools are fully functional
- Server connects to Odoo and executes operations successfully
Working Configuration for JSON-RPC:
# Test via curl (this works):
curl -X POST http://localhost:8000/ \
-H "Content-Type: application/json" \
-d '{
"jsonrpc": "2.0",
"id": 1,
"method": "tools/call",
"params": {
"name": "search_count",
"arguments": {"model": "res.partner"}
}
}'
- search_records - Search for records in any Odoo model
- get_record - Get detailed information about specific records
- create_record - Create new records in Odoo
- update_record - Update existing records
- delete_record - Delete records from Odoo
- list_models - Discover available models in your Odoo instance
- get_model_fields - Get field definitions for a model
🐳 Docker Services
Core Services
- mcp-server: Main MCP server with HTTP streaming
- redis: Session management and caching (optional)
- nginx: Reverse proxy with SSL termination (optional)
Service Management
# Start basic services
docker-compose up -d
# Start with Redis for session management
docker-compose --profile redis up -d
# Start with Nginx reverse proxy
docker-compose --profile proxy up -d
# View logs
docker-compose logs -f mcp-server
# Scale services
docker-compose up -d --scale mcp-server=3
# Update services
docker-compose pull
docker-compose up -d
# Stop services
docker-compose down
# Clean up
docker-compose down -v --remove-orphans
Endpoints
- MCP Endpoint:
http://localhost:8000/mcp or http://localhost:8000/ (POST) - Health Check:
http://localhost:8000/health - API Documentation:
http://localhost:8000/docs - Server Info:
http://localhost:8000/ (GET)
🔧 Development
Local Development Setup
# Clone repository
git clone https://github.com/vzeman/odoo-mcp-server.git
cd odoo-mcp-server
# Create virtual environment
python -m venv venv
source venv/bin/activate # On Windows: venv\Scripts\activate
# Install in development mode
pip install -e ".[dev]"
# Set up environment
cp .env.example .env
# Edit .env with your configuration
# Run the server
python -m mcp_server_odoo
Testing
# Install test dependencies
pip install -e ".[dev]"
# Run tests
pytest
# Run with coverage
pytest --cov=mcp_server_odoo
# Test HTTP endpoints
curl -X POST http://localhost:8000/mcp \
-H "Content-Type: application/json" \
-H "Accept: application/json, text/event-stream" \
-d '{"jsonrpc":"2.0","id":1,"method":"initialize","params":{"protocolVersion":"2024-11-05","capabilities":{},"clientInfo":{"name":"test","version":"1.0"}}}'
Code Quality
# Type checking
mypy mcp_server_odoo
# Linting and formatting
ruff check .
ruff format .
# Security scanning
bandit -r mcp_server_odoo
Docker Development
# Build development image
docker build -t odoo-mcp-server:dev .
# Run development container
docker run -p 8000:8000 \
-e ODOO_URL="https://demo.odoo.com" \
-e ODOO_DB="demo" \
-e ODOO_USERNAME="demo" \
-e ODOO_API_KEY="your-key" \
odoo-mcp-server:dev
# Development with volume mounting
docker run -p 8000:8000 \
-v $(pwd)/mcp_server_odoo:/app/mcp_server_odoo \
-e ODOO_URL="https://demo.odoo.com" \
odoo-mcp-server:dev
Contributing
Contributions are welcome! Please feel free to submit a Pull Request.
License
This project is licensed under the MIT License - see the LICENSE file for details.
Support
For issues and feature requests, please use the GitHub issue tracker.